WebLogic Operator를 사용하여 Kubernetes에 WebLogic 올리기
Oracle WebLogic Server 12c 버전 부터 Kubernetes Cluster에 WebLogic Domain을 쉽게 올릴 수 있도록 하는 WebLogic Operator를 지원하고 있다.
이 문서에서는 Managed Kubernetes Cloud 서비스인 Oracle Kubernetes Engine(OKE)와 WebLogic Operator를 사용하여 웹로직 도메인을 Provision하는 방법에 대해서 다룰 것이다.
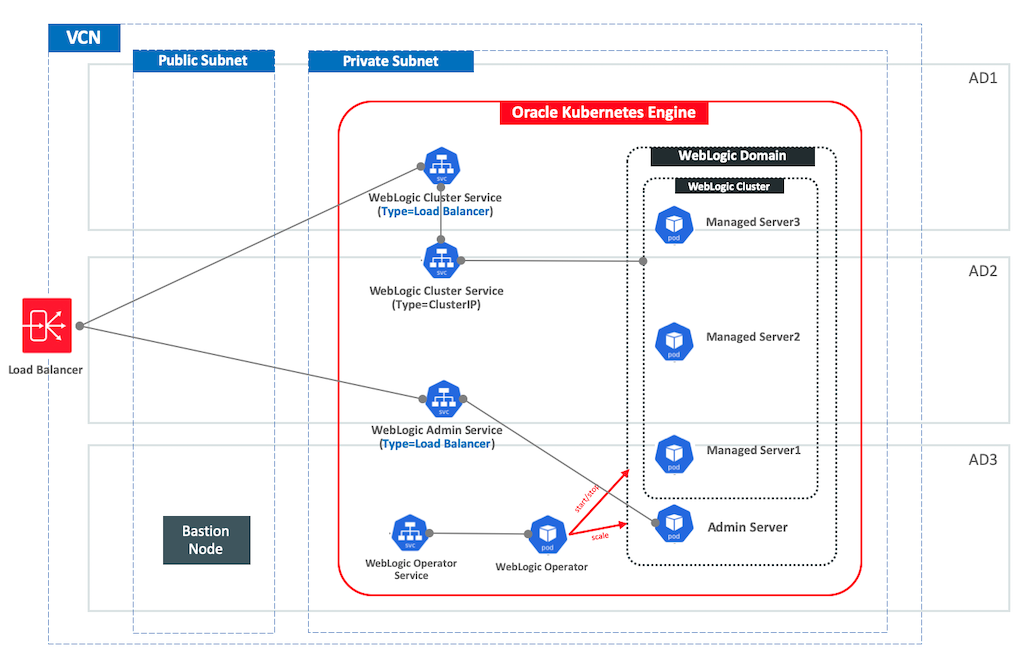
Architecture
Prerequistes
-
Oracle Kubernetes Engine(OKE) : 여기에서는 OKE를 Provision하는 방법에 대해서 다루지 않을 것이다. OKE 프로비전 과정은 다음 문서를 참고한다.
OKE 접속 확인하기
위 과정을 따라 OKE를 생성하고 Kubeconfig까지 설정하였다고 하면 kubectl을 통해 worker node의 상태를 확인해 본다.
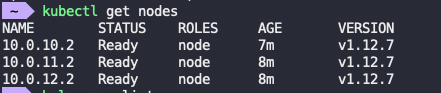
OKE를 통해 Kubernetes Cluster를 기본 설정으로 구성하면 Private Subnet 안에 Worker Node가 구성되므로 Node IP가 Private IP로 할당된다.
WebLogic Operator 설치
WebLogic Operator는 helm을 통해 설치 된다. 먼저 WebLogic Operator를 위한 Repository를 추가해 준다.
helm repo add weblogic-operator https://oracle.github.io/weblogic-kubernetes-operator/charts
잘 추가되었는지 확인해 본다.

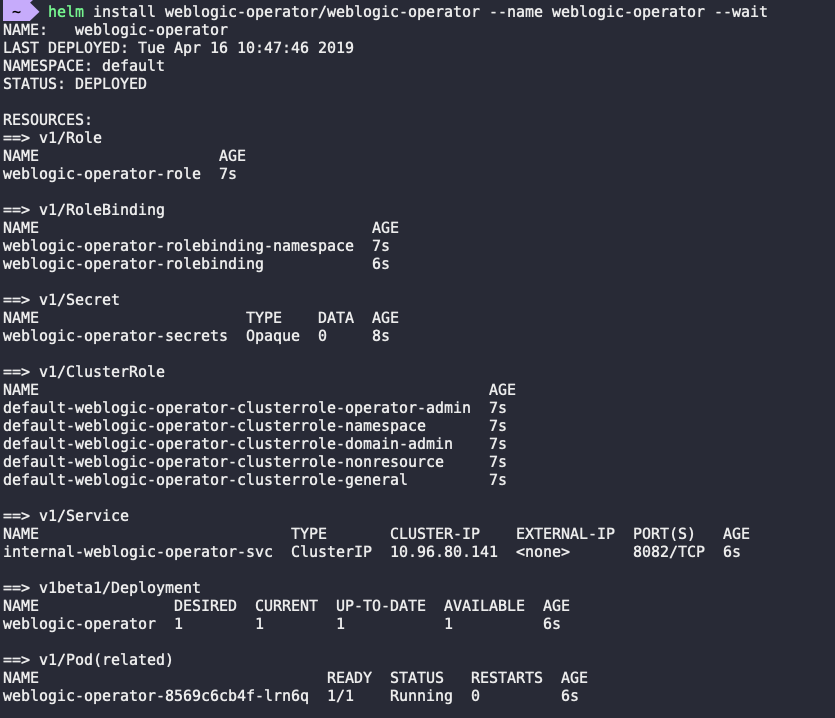
helm을 통해 weblogic-operator를 설치한다 default 설정으로 설치하면 defaut namespace에 설치된다.
helm install weblogic-operator/weblogic-operator --name weblogic-operator --wait
WebLogic Image 준비
WebLogic Domain을 생성하기 위해서는 WebLogic Server Image가 필요하다. Dockerhub에서 Oracle Certified WebLogic Server Image를 다운 받을 수 있다. 이 이미지를 사용하려면 License Agreement를 Accept 해야 한다. 이 과정을 거치면 이미지를 다운 받는 방법이 보여진다.
> docker login

> docker pull store/oracle/weblogic:12.2.1.3

WebLogic Domain 준비
WebLogic Operator를 사용하여 원하는 형태의 WebLogic Domain을 만들어 프로비전 하려면 관련 Kubernetes Configuration File(YAML)이 필요하다.
WebLogic Operator 사이트에서 몇가지 샘플을 제공하고 있다. 다음을 통해 소스를 받아온다.
git clone https://github.com/oracle/weblogic-kubernetes-operator.git
weblogic-kubernetes-operator/kubernetes/samples/scripts에 필요한 Script들이 존재하고 이 스크립트를 통해서 Kubernates configuration 파일을 생성시킬 것이다.
먼저 도메인 구성에 필요한 credential을 생성한다. 제공된 create-weblogic-credentials.sh을 통해 생성하면 된다. 사용법은 다음과 같다.
./create-weblogic-credentials.sh -h
usage: ./create-weblogic-credentials.sh -u username -p password [-d domainUID] [-n namespace] [-s secretName] [-h]
  -u username, must be specified.
  -p password, must be specified.
  -d domainUID, optional. The default value is domain1. If specified, the secret will be labeled with the domainUID unless the given value is an empty string.
> cd scripts/create-weblogic-domain-credentials
> ./create-weblogic-credentials.sh \
   -u weblogic -p welcome1 \
   -d domain1 -n default  \
   -s domain1-weblogic-credentials
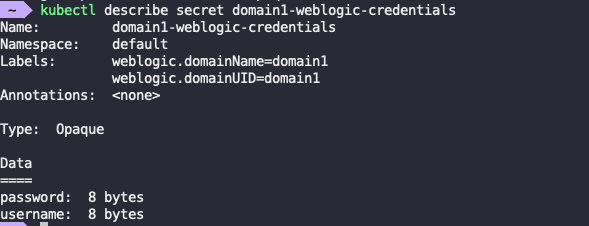
다음과 같이 생성 된다.

kubectl로 생성된 secret 정보를 확인해 볼 수 있다.
이제 Domain 생성에 필요한 구성 파일들을 생성할 단계가 되었다.
여러가지 샘플들 중에서 구성이 가장 간단한 Domain in a Docker image Model를 먼저 사용해 볼 것이다. 해당 디렉토리로 이동하여 create-domain.sh를 수행한다. 사용법은 다음과 같다.
> cd weblogic-kubernetes-operator/kubernetes/samples/scripts/create-weblogic-domain/domain-home-in-image
> ./create-domain.sh \
  -u username \
  -p password \
  -i create-domain-inputs.yaml \
  -o /path/to/output-directory
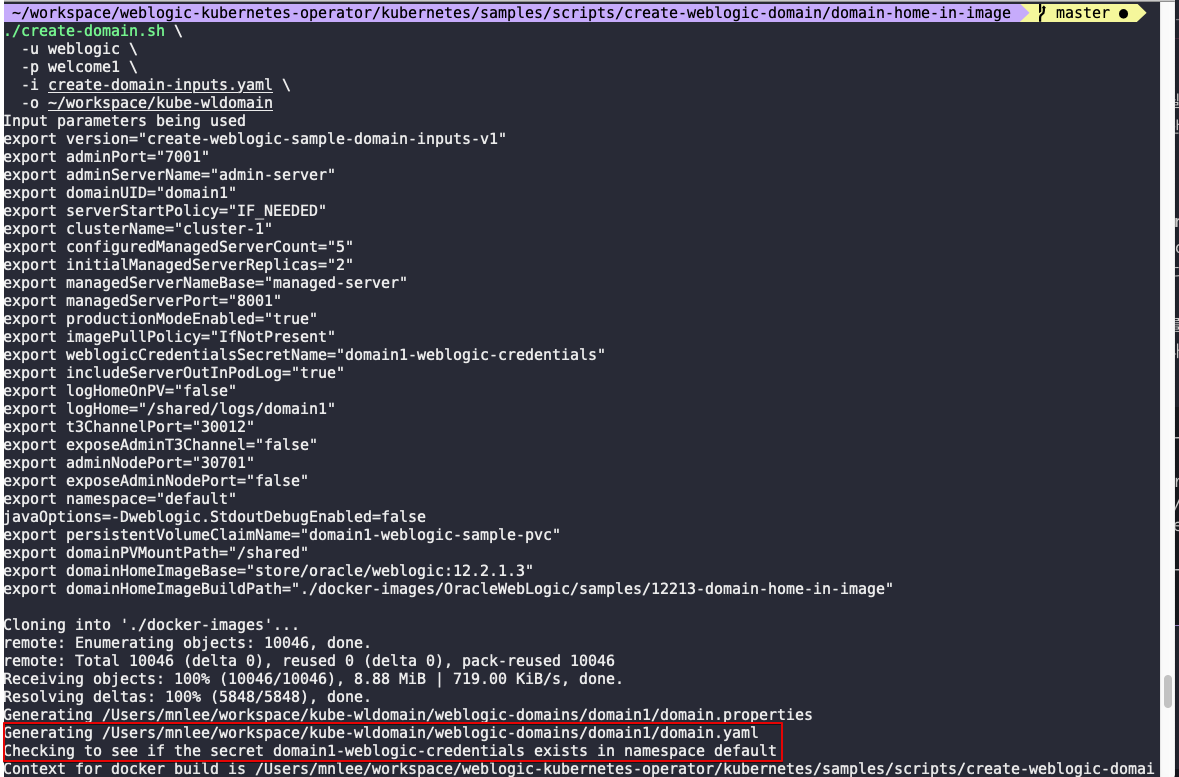
진행 사항이 계속 보이고 마지막에 생성된 산출물들의 위치가 표시된다.
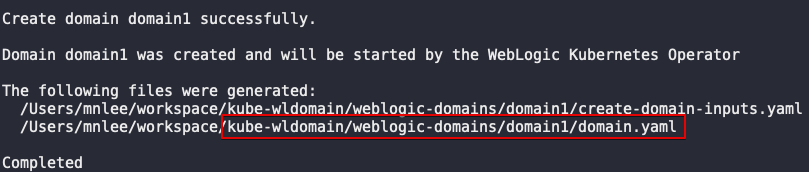
해당 디렉토리로 이동하여 생성된 산출물의 내용을 한번 확인해 보자
두개의 파일과 Docker Image가 생성된 것을 볼 수 있다.

domain.yaml 내용
# Copyright 2017, 2019, Oracle Corporation and/or its affiliates. All rights reserved.
# Licensed under the Universal Permissive License v 1.0 as shown at http://oss.oracle.com/licenses/upl.
#
# This is an example of how to define a Domain resource.
#
apiVersion: "weblogic.oracle/v3"
kind: Domain
metadata:
  name: domain1
  namespace: default
  labels:
    weblogic.resourceVersion: domain-v2
    weblogic.domainUID: domain1
spec:
  # The WebLogic Domain Home
  domainHome: /u01/oracle/user_projects/domains/domain1
  # If the domain home is in the image
  domainHomeInImage: true
  # The WebLogic Server Docker image that the Operator uses to start the domain
  image: "domain-home-in-image:12.2.1.3"
  # imagePullPolicy defaults to "Always" if image version is :latest
  imagePullPolicy: "IfNotPresent"
  # Identify which Secret contains the credentials for pulling an image
  #imagePullSecrets:
  #- name:
  # Identify which Secret contains the WebLogic Admin credentials (note that there is an example of
  # how to create that Secret at the end of this file)
  webLogicCredentialsSecret:
    name: domain1-weblogic-credentials
  # Whether to include the server out file into the pod's stdout, default is true
  includeServerOutInPodLog: true
  # Whether to enable log home
  # logHomeEnabled: false
  # The in-pod location for domain log, server logs, server out, and Node Manager log files
  # logHome: /shared/logs/domain1
  # serverStartPolicy legal values are "NEVER", "IF_NEEDED", or "ADMIN_ONLY"
  # This determines which WebLogic Servers the Operator will start up when it discovers this Domain
  # - "NEVER" will not start any server in the domain
  # - "ADMIN_ONLY" will start up only the administration server (no managed servers will be started)
  # - "IF_NEEDED" will start all non-clustered servers, including the administration server and clustered servers up to the replica count
  serverStartPolicy: "IF_NEEDED"
  serverPod:
    # an (optional) list of environment variable to be set on the servers
    env:
    - name: JAVA_OPTIONS
      value: "-Dweblogic.StdoutDebugEnabled=false"
    - name: USER_MEM_ARGS
      value: "-Djava.security.egd=file:/dev/./urandom -Xms64m -Xmx256m "
    # volumes:
    # - name: weblogic-domain-storage-volume
    #   persistentVolumeClaim:
    #     claimName: domain1-weblogic-sample-pvc
    # volumeMounts:
    # - mountPath: /shared
    #   name: weblogic-domain-storage-volume
  # adminServer is used to configure the desired behavior for starting the administration server.
  adminServer:
    # serverStartState legal values are "RUNNING" or "ADMIN"
    # "RUNNING" means the listed server will be started up to "RUNNING" mode
    # "ADMIN" means the listed server will be start up to "ADMIN" mode
    serverStartState: "RUNNING"
    # adminService:
    #   channels:
    # The Admin Server's NodePort
    #    - channelName: default
    #      nodePort: 30701
    # Uncomment to export the T3Channel as a service
    #    - channelName: T3Channel
  # clusters is used to configure the desired behavior for starting member servers of a cluster.
  # If you use this entry, then the rules will be applied to ALL servers that are members of the named clusters.
  clusters:
  - clusterName: cluster-1
    serverStartState: "RUNNING"
    replicas: 2
  # The number of managed servers to start for unlisted clusters
  # replicas: 1
위 파일에서 image 부분을 수정해 줄 것이다. 현재 Domain Image는 Local Repository에 존재하는데 Cloud의 OKE에서는 내 Local Repository에 접근할 수 없기 때문에, 이 이미지를 Docker Hub에 올려준 후 docker hub의 이미지를 참조하도록 할 것이다.
먼저 domain.yaml 파일을 수정해 준다.
# Before
  image: "domain-home-in-image:12.2.1.3"

# After
# image: "[dockerhub repository name]/domain-home-in-image:12.2.1.3"
  image: "mnlee30/domain-home-in-image:12.2.1.3"
Domain Image를 Dockerhub에 push 하기 위해 tag를 변경해 준다.
docker tag domain-home-in-image:12.2.1.3 mnlee30/domain-home-in-image:12.2.1.3

image를 docker hub에 push 한다
docker push mnlee30/domain-home-in-image:12.2.1.3

이제 domain.yaml을 배포할 준비가 모두 완료되었다. 다음을 수행한다.
kubectl apply -f domain.yaml
kubectl 명령어를 통해 domain이 잘 생성되고 있음을 확인 할 수 있다.
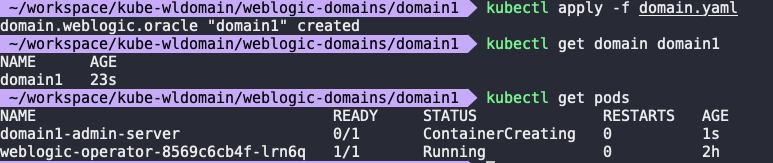
Admin Server 1개와 Managed Server 2개로 구성된 도메인이 생성되었음을 확인할 수 있다.

service 정보를 확인해 보자. 앞서서 OKE의 Worker Node가 Private Subnet에 생성되었다고 설명하였다. 따라서 WebLogic Instance들을 Node IP로는 접근할 수가 없다.

이 서비스들을 Load Balancer를 통해 서비스 될 수 있도록 LoadBalancer Type을 사용하는 서비스를 추가해 줄 것이다. Admin Server(domain1-admin-server)의 콘솔에 접근하기 위한 서비스와 Cluster(domain1-cluster-cluster-1)에 접근하는 서비스가 필요하다.
Admin Server용 서비스
service-admin-lb.yaml 파일을 생성해 준다
apiVersion: v1
kind: Service
metadata:
  name: domain1-admin-lb-ext
  namespace: default
  labels:
    app: domain1-admin
  annotations:
    service.beta.kubernetes.io/oci-load-balancer-shape: "100Mbps"
    service.beta.kubernetes.io/oci-load-balancer-backend-protocol: "HTTP"
spec:
  type: LoadBalancer
  ports:
  - name: http
    port: 6001
    targetPort: 7001
  selector:
    weblogic.serverName: admin-server
    weblogic.domainUID: domain1
생성된 파일을 적용한다.
kubectl apply -f service-admin-lb.yaml
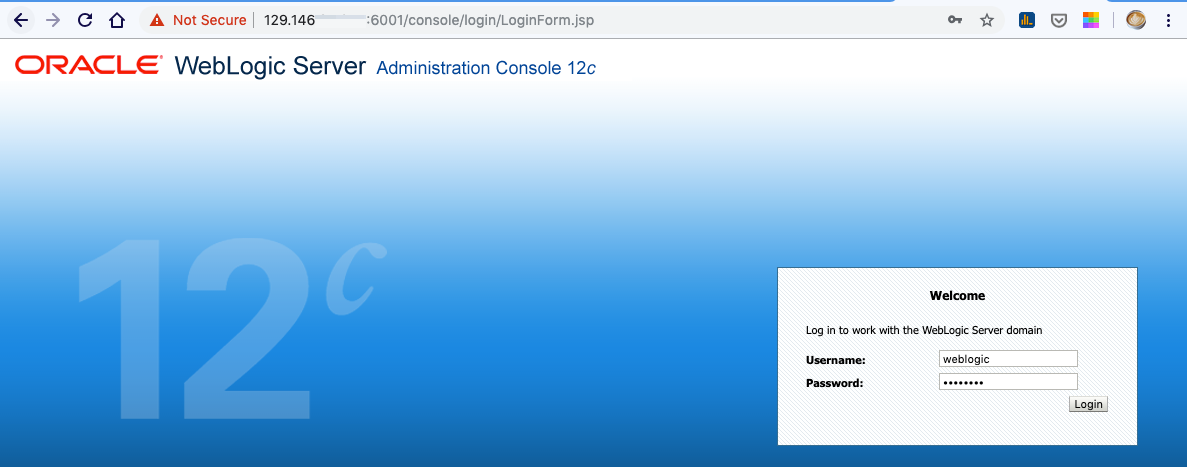
서비스가 생성되고 EXTERNAL-IP가 할당된 것을 볼 수 있다.

이 IP를 이용하여 WebLogic Console에 접근해 본다.
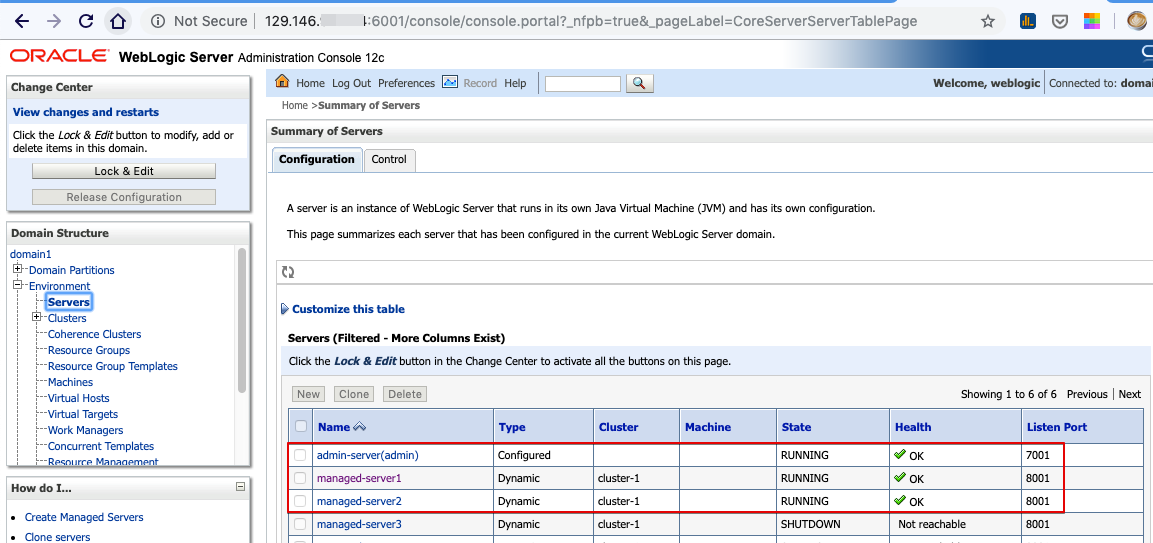
다음과 같이 WebLogic Managed Sever들이 Running 중 임을 볼 수 있다.
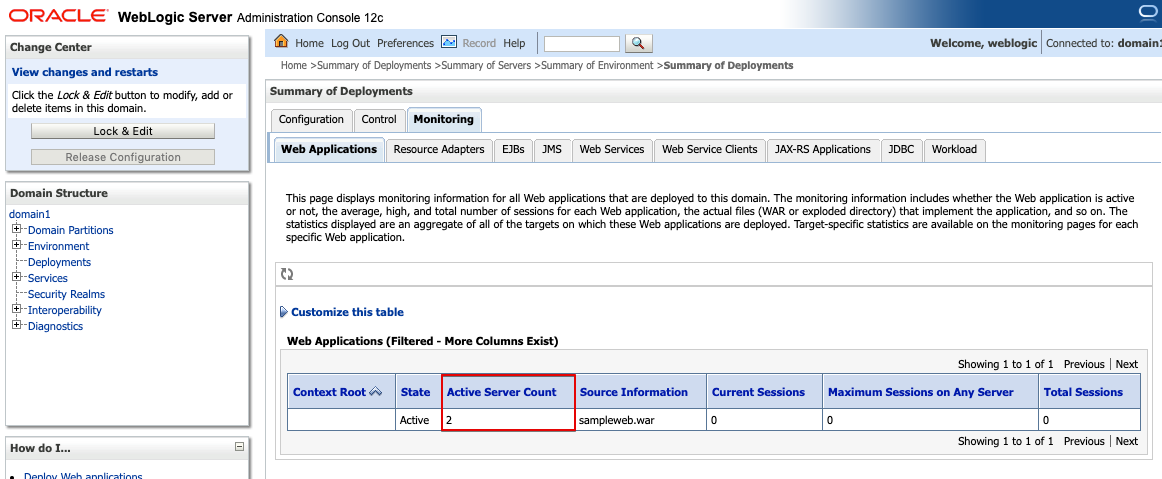
이 도메인에는 어떤 애플리케이션도 배포되어 있지 않기 때문에 Sample Application을 WebLogic Console을 통해 배포 한다.
배포 과정은 여기서는 생략 한다. 배포된 후의 모습은 다음과 같다.
Cluster용 서비스
위에서 배포한 애플리케이션을 테스트 해보기 위해서는 weblogic cluster 서비스에 접근해야 한다. 이를 위해 LoadBalancer Type의 서비스를 하나 더 추가해 준다.
service-cluster-lb.yaml 파일을 생성해 준다
apiVersion: v1
kind: Service
metadata:
  name: domain1-cluster1-lb-ext
  namespace: default
  labels:
    app: domain1-cluster1
  annotations:
    service.beta.kubernetes.io/oci-load-balancer-shape: "100Mbps"
    service.beta.kubernetes.io/oci-load-balancer-backend-protocol: "HTTP"
spec:
  type: LoadBalancer
  ports:
  - name: http
    port: 80
    targetPort: 8001
  selector:
    weblogic.clusterName: cluster-1
    weblogic.domainUID: domain1
생성된 파일을 적용한다.
kubectl apply -f service-cluster-lb.yaml

서비스가 생성되고 EXTERNAL-IP가 할당된 것을 볼 수 있다.
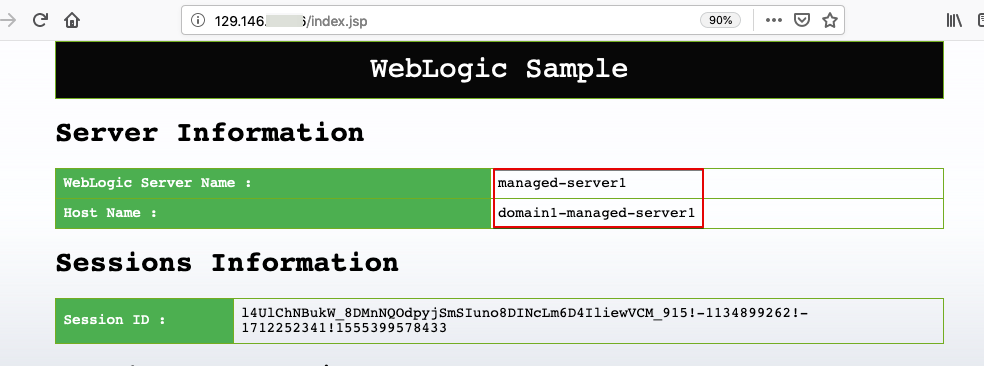
위 IP를 통해서 애플리케이션에 접속해 본다. 샘플 애플리케이션을 통해 WebLogic Managed Server 명과 구동되고 있는 Pod의 Hostname을 볼수 있다.
제공된 Session Insert / Update 기능을 통해 세션도 추가해 본다.

브라우저를 새로 열어 다른 Managed Server에 연결되게 해본다. 라운드 로빈에 의해서 다른 서버에서 요청이 처리되는 것을 볼 수 있다.
Saling Up / Down은 다음 글에서 다룰 예정이다.