챗봇 Hands-on Lab (3) - 피자봇 만들기
이 Lab에서는 피자봇을 직접 만들어 볼 것입니다.
학습 내용
- Flow 구현
- Intent / Dialog 테스트
구현에 들어가기 앞서서 피자봇이 어떤 기능을 가지고 있는지 먼저 살펴봅니다. 제공되는 피자봇은 다음과 같이 4개의 Intent를 가지고 있습니다.
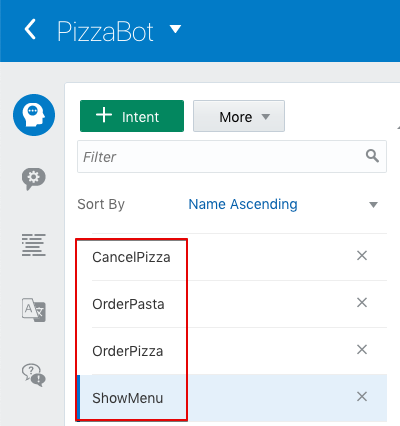
Flow가 구현되어 있는 제공된 피자봇(PizzaBot) 으로 먼저 4개의 Intent가 어떻게 동작하는지 확인한 후에 각 기능을 구현해 보도록 하겠습니다.
## Test UI로 피자봇 테스트 하기
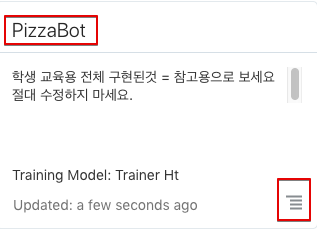
공통으로 사용할 것이기 때문에 Flow나 Intent를 수정하지 않도록 조심하세요.
PizzaBot 타이틀을 클릭하여 PizzaBot으로 들어갑니다.
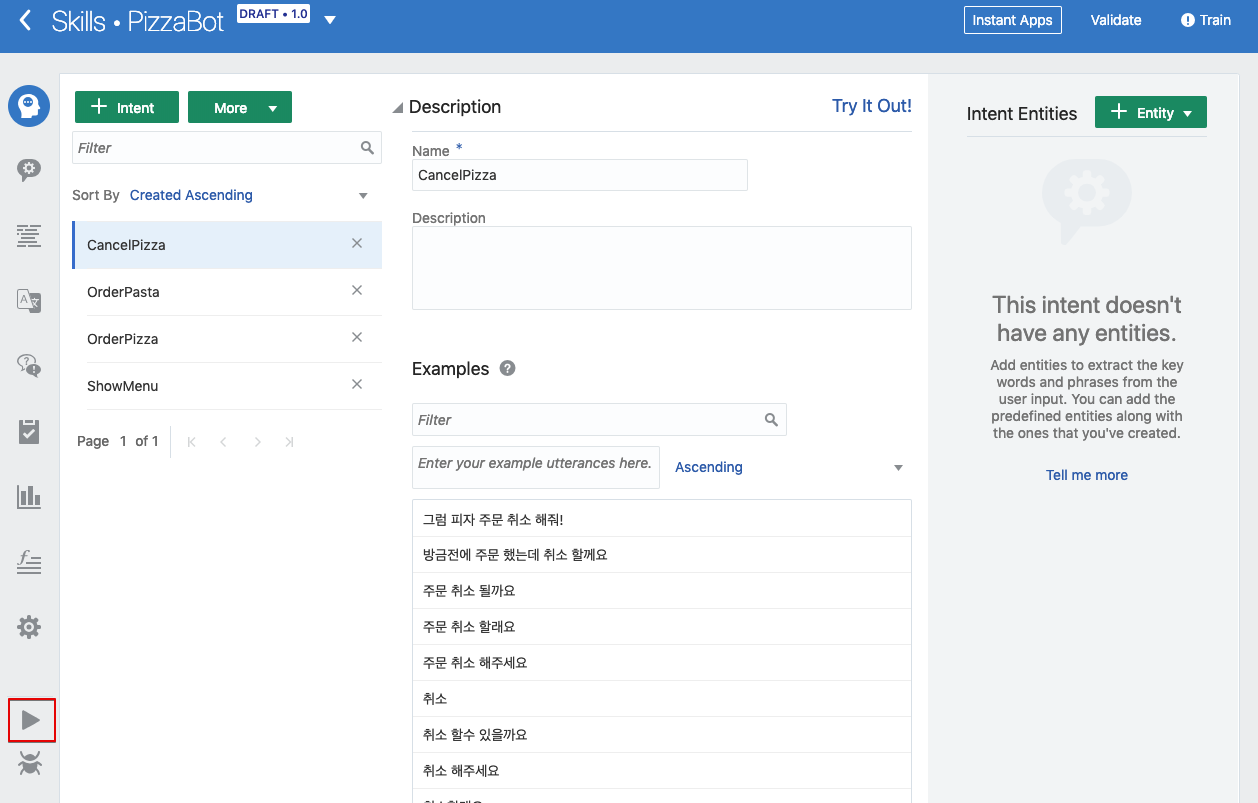
왼편 메뉴 하단의 ▶ 버튼을 클릭하여 Test UI를 엽니다.
피자 주문하기
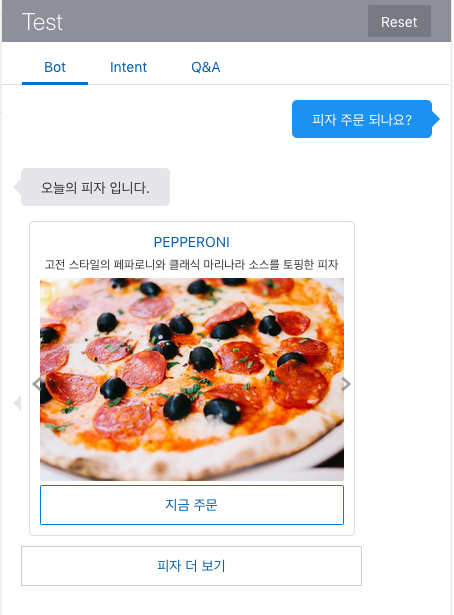
다음 예시의 문장을 입력하여 테스트 합니다.
- 피자 주문해줘
- 피자 주문하고 싶어요
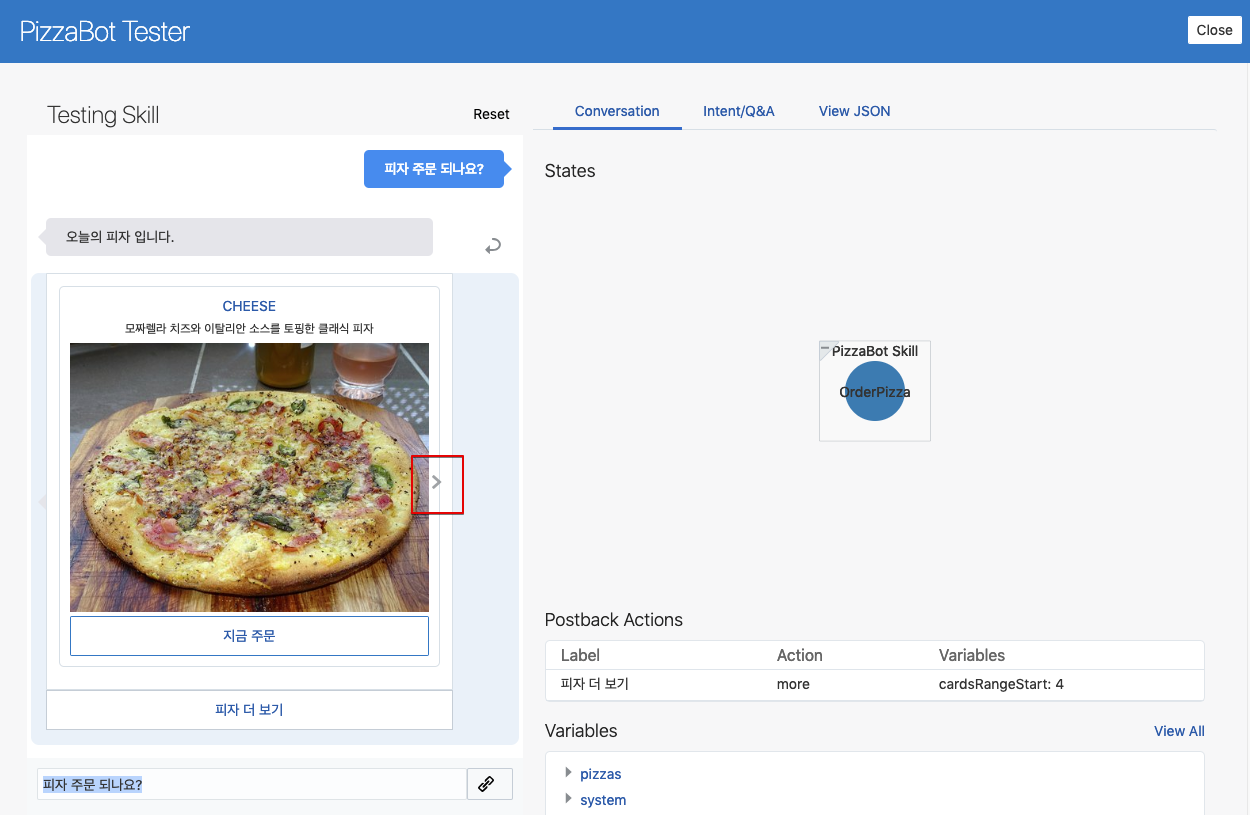
피자 더 보기를 클릭하거나 이미지 왼쪽 / 오른쪽의 < / > 를 클릭하여 더 많은 피자를 볼 수 있습니다.
지금 주문을 클릭합니다. 사이즈를 묻는 질문에 원하는 크기를 선택합니다.
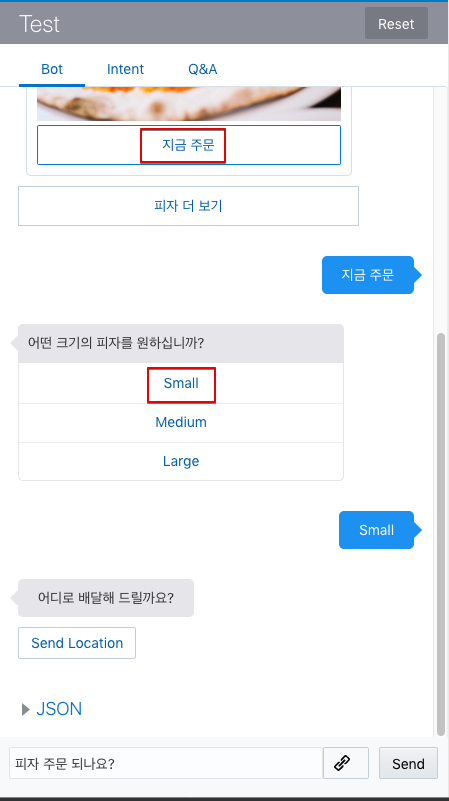
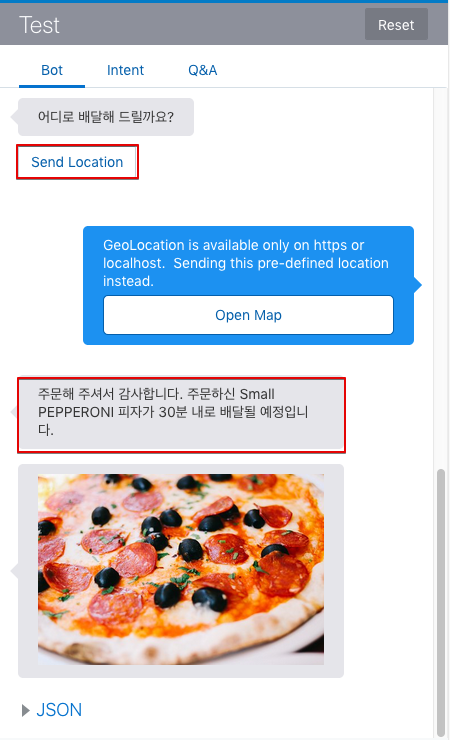
Send Location 버튼을 클릭하면 사용자의 위치가 전송되고 주문이 완료됩니다.
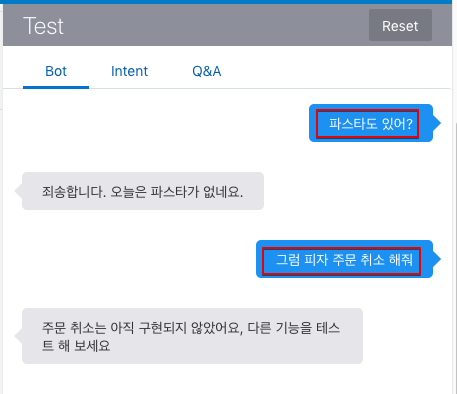
파스타 주문하기 / 주문 취소하기 / 메뉴 보기
Test UI 창 상단의 Reset 버튼을 클릭하고 다른 기능도 테스트 해봅니다.

파스타 주문과 주문 취소 Intent가 잘 인지되고 있는 것을 볼 수 있습니다. 이 Lab에서는 해당 기능은 구현하지 않을 것이기 때문에 다음과 같이 구현되지 않았다고 대답합니다.
피자봇 구현해 보기
이제 본격적으로 피자봇의 기능을 구현해 보겠습니다.
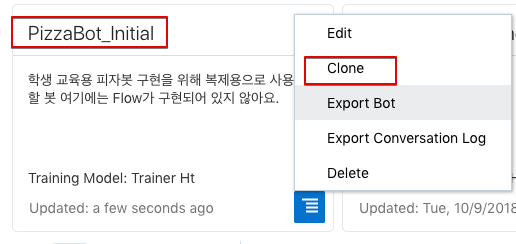
피자봇의 4개의 Intent와 Entity 그리고 약간의 기본 Flow를 담고 있는 초기 버전의 PizzaBot_Initial이 등록되어 있습니다. 이 Bot을 복제하여 구현을 시작하도록 하겠습니다. PizzaBot_Initial의 Clone 메뉴를 클릭하여 복제본을 만듭니다.
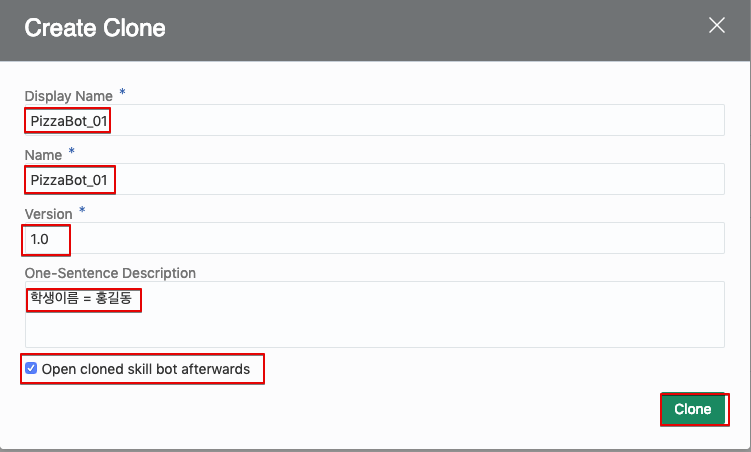
- Display Name : 항목을 본인에게 부여된 SEQ를 suffix로 하여 PizzaBot_{SEQ}
- Name : PizzaBot_{SEQ}
- Version : 1.0
- Description : 학생이름 = [본인이름]
- Open cloned skill bot afterwards : check
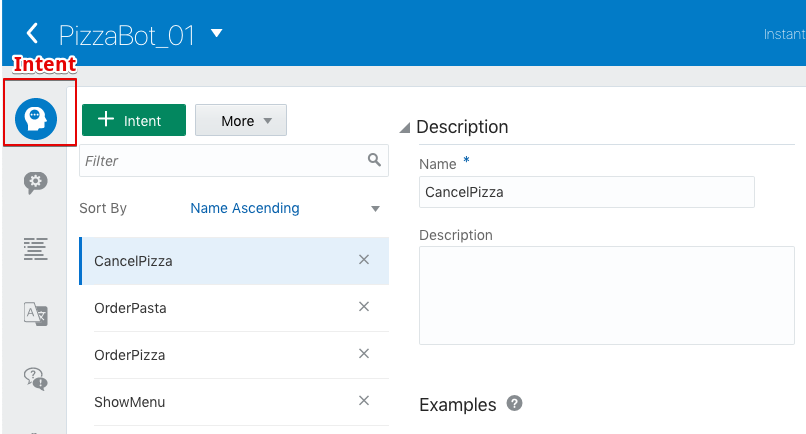
복제가 잘 되었는지 확인합니다. Intent 아이콘과 Flow 아이콘을 클릭해 봅니다.
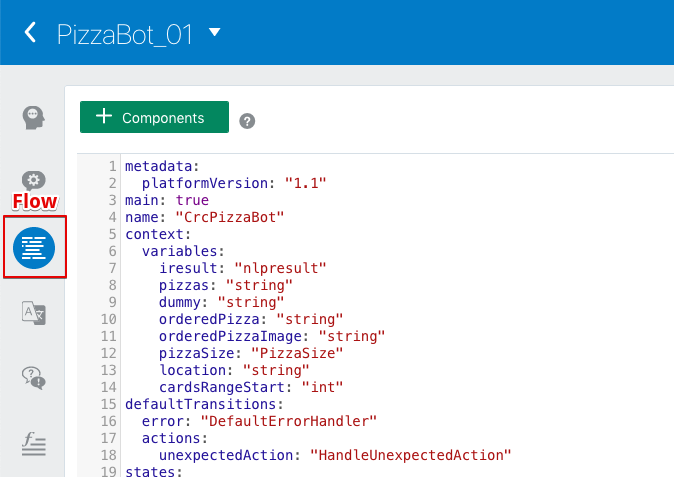
이제 Flow를 추가해 보도록 하겠습니다.
파스타 주문하기
파스타 주문하기는 세부 Flow가 없이 바로 단답형으로 대답하는 가장 간단한 형태이므로 제일 먼저 추가해 보겠습니다.
OrderPasta에 매칭되는 Utterance가 들어오면 OrderPasta 단계를 호출할 수 있도록 Intent 단계의 Action에 OrderPasta를 부르도록 다음과 같이 추가 합니다.
수정 전
  Intent:
    component: "System.Intent"
    properties:
      variable: "iresult"
#      confidenceThreshold : 0.8
    transitions:
      actions:
        unresolvedIntent: "Unresolved"
        CancelPizza : "CancelPizza"
        # OrderPasta 추가
        # OrderPizza 추가
        OrderPasta : "OrderPasta"
수정 후
Intent:
component: "System.Intent"
properties:
variable: "iresult"
# confidenceThreshold : 0.8
transitions:
actions:
unresolvedIntent: "Unresolved"
CancelPizza : "CancelPizza"
# OrderPasta 추가
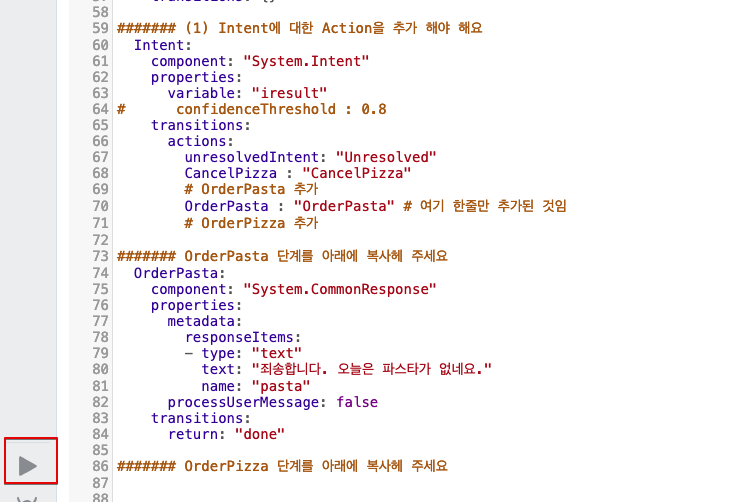
OrderPasta : "OrderPasta" # 여기 한줄만 추가된 것임
# OrderPizza 추가
호출되는 OrderPasta 단계를 ”####### OrderPasta 단계를 아래에 복사헤 주세요” 주석 아래에 복사해 주세요.
수정 전
####### OrderPasta 단계를 아래에 복사헤 주세요
수정 후
####### OrderPasta 단계를 아래에 복사헤 주세요
  OrderPasta:
    component: "System.CommonResponse"
    properties:
      metadata:
        responseItems:
        - type: "text"
          text: "죄송합니다. 오늘은 파스타가 없네요."
          name: "pasta"
      processUserMessage: false
    transitions:
      return: "done"
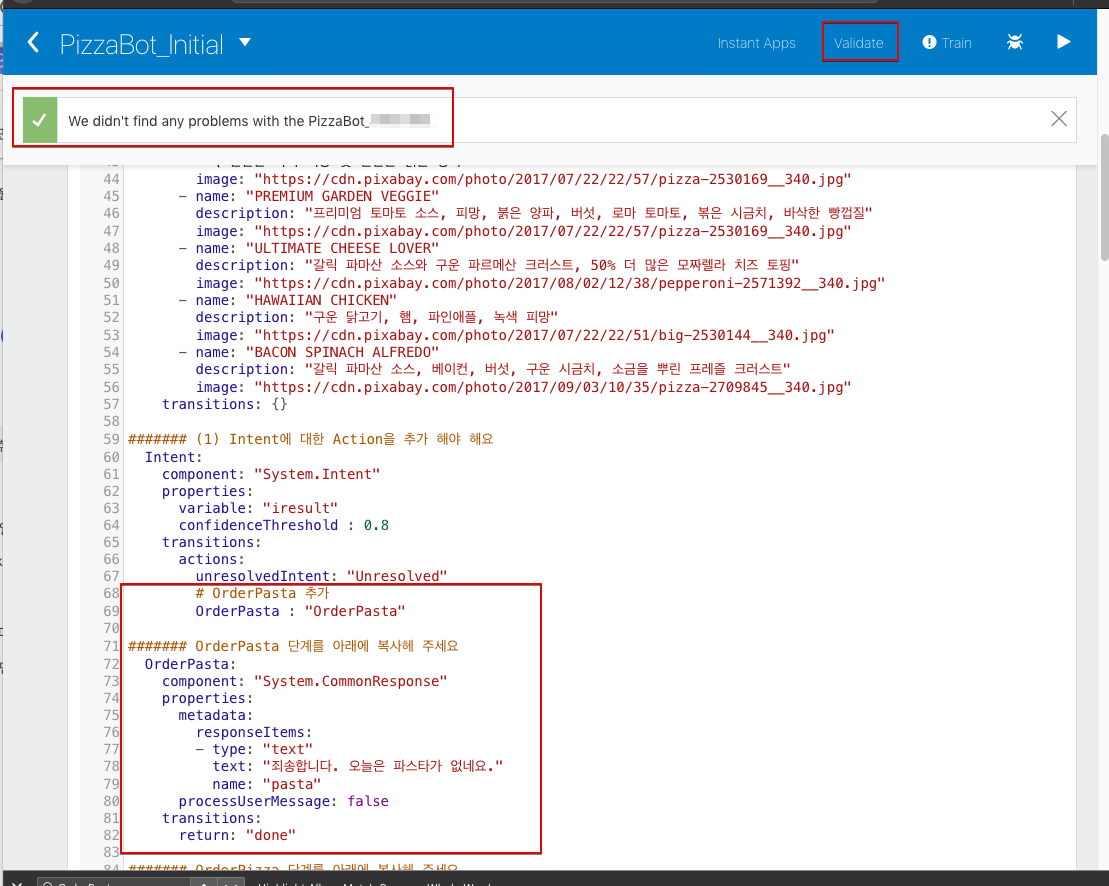
Flow가 완성되었으면 우측 상단의 Validate를 클릭하여 flow에 오류가 없는지 확인합니다.
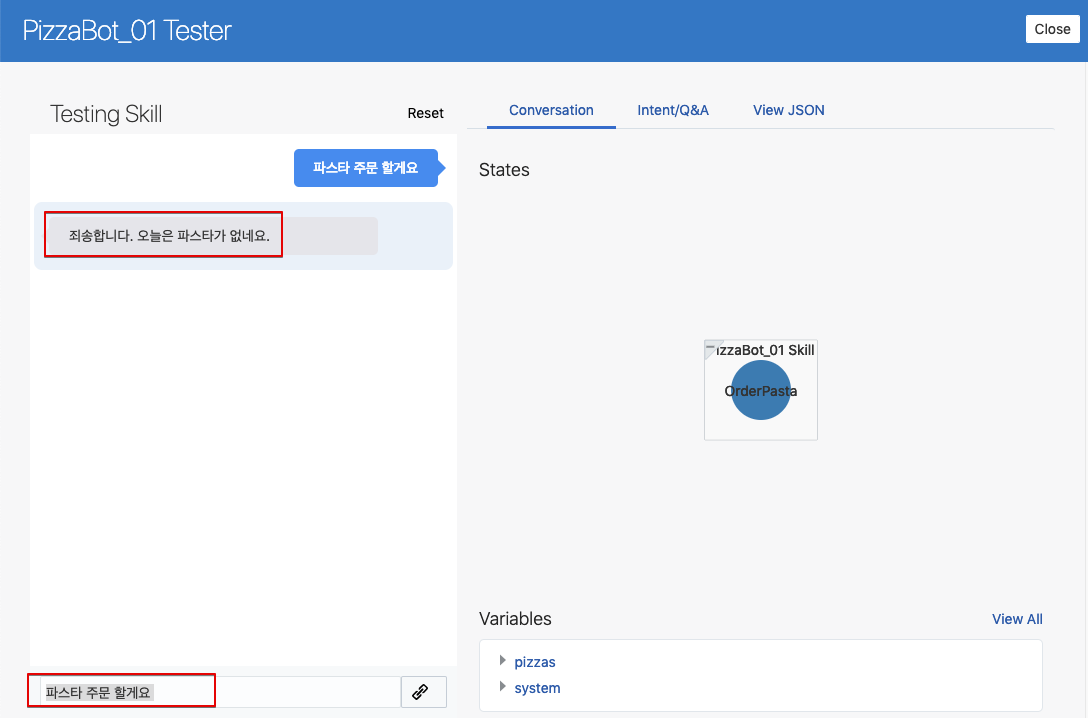
오류가 없다면 Test UI를 열어서 해당 flow가 잘 동작하는지 확인합니다. 왼쪽 하단의 ▶ 버튼을 클릭하여 Test UI를 엽니다.
피자 주문하기 구현
이제 여러 단계의 flow를 가지는 피자주문 (OrderPizza) 로직을 추가하도록 하겠습니다.
피자 주문하기는 다음과 같은 Flow를 가집니다.
| 순서 | State 명 | 실행 내용 |
|---|---|---|
| 1 | OrderPizza | Pizza 리스트 보여주기 |
| 2 | AskPizzaSize | 주문할 피자 크기 물어보기 (Small / Medium / Large) |
| 3 | AskLocation | 배달할 위치 물어보기 (Send Location) |
| 4 | Confirmation | 주문 확인 |
OrderPizza에 매칭되는 Utterance가 들어오면 OrderPizza 단계를 호출할 수 있도록 Intent 단계의 Action에 OrderPizza를 부르도록 다음과 같이 추가 합니다.
수정 전
  Intent:
    component: "System.Intent"
    properties:
      variable: "iresult"
#      confidenceThreshold : 0.8
    transitions:
      actions:
        unresolvedIntent: "Unresolved"
        # OrderPasta 추가
        OrderPasta : "OrderPasta"
        # OrderPizza 추가
수정 후
  Intent:
    component: "System.Intent"
    properties:
      variable: "iresult"
#      confidenceThreshold : 0.8
    transitions:
      actions:
        unresolvedIntent: "Unresolved"
        # OrderPasta 추가
        OrderPasta : "OrderPasta"
        # OrderPizza 추가
        OrderPizza : "OrderPizza"  # 여기 한줄만 변경됨
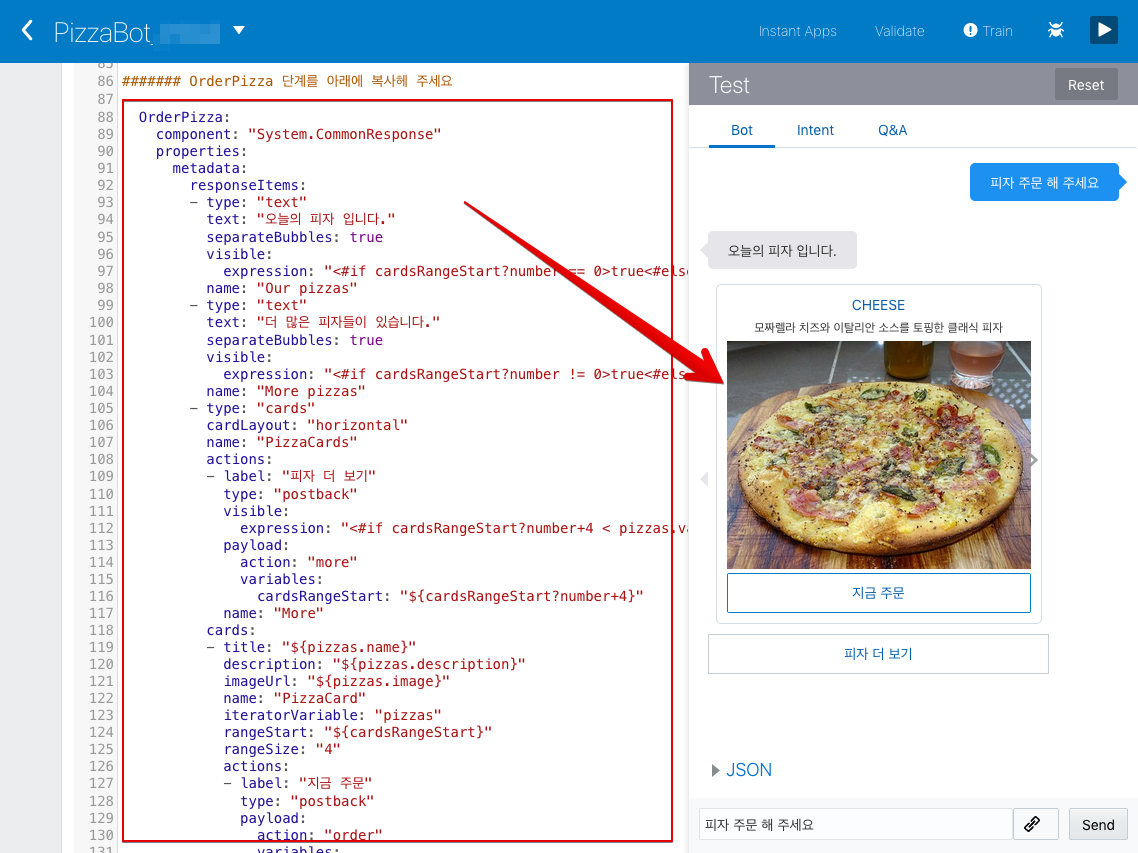
불리어지는 OrderPizza 단계를 ”####### OrderPizza 단계를 아래에 복사헤 주세요” 주석 아래에 있는 코드 부분을 전체 변경해 줍니다 (수정전 –> 수정후) OrderPizza 단계는 여러개의 피자를 Card layout으로 이미지와 함께 보여주는 로직 입니다.
수정 전
####### OrderPizza 단계를 아래에 복사헤 주세요
  OrderPizza:
    component: "System.CommonResponse"
    properties:
      metadata:
        responseItems:
        - type: "text"
          text: "오늘의 피자 입니다."
    transitions:
    transitions:
      return: "done"
수정 후
####### OrderPizza 단계를 아래에 복사헤 주세요
  OrderPizza:
    component: "System.CommonResponse"
    properties:
      metadata:
        responseItems:
        - type: "text"
          text: "오늘의 피자 입니다."
          separateBubbles: true
          visible:
            expression: "<#if cardsRangeStart?number == 0>true<#else>false</#if>"
          name: "Our pizzas"
        - type: "text"
          text: "더 많은 피자들이 있습니다."
          separateBubbles: true
          visible:
            expression: "<#if cardsRangeStart?number != 0>true<#else>false</#if>"
          name: "More pizzas"
        - type: "cards"
          cardLayout: "horizontal"
          name: "PizzaCards"
          actions:
          - label: "피자 더 보기"
            type: "postback"
            visible:
              expression: "<#if cardsRangeStart?number+4 < pizzas.value?size>true<#else>false</#if>"
            payload:
              action: "more"
              variables:
                cardsRangeStart: "${cardsRangeStart?number+4}"
            name: "More"
          cards:
          - title: "${pizzas.name}"
            description: "${pizzas.description}"
            imageUrl: "${pizzas.image}"
            name: "PizzaCard"
            iteratorVariable: "pizzas"
            rangeStart: "${cardsRangeStart}"
            rangeSize: "4"
            actions:
            - label: "지금 주문"
              type: "postback"
              payload:
                action: "order"
                variables:
                  orderedPizza: "${pizzas.name}"
                  orderedPizzaImage: "${pizzas.image}"
              name: "Order"
          channelCustomProperties:
          - channel: "facebook"
            properties:
              top_element_style: "large"
      processUserMessage: true
    transitions:
      actions:
        order: "AskPizzaSize"
        more: "OrderPizza"
        textReceived: "Intent"
OrderPizza 단계에서 지금 주문을 클릭하게 되면 피자 크기를 묻는 AskPizzaSize 단계로 이동하게 됩니다.
불리어지는 AskPizzaSize 단계를 ”####### AskPizzaSize 단계를 아래에 복사헤 주세요” 주석 아래의 코드를 변경해 주세요 (수정전 –> 수정후)
수정 전
####### AskPizzaSize 단계를 아래에 복사헤 주세요
  AskPizzaSize:
    component: "System.CommonResponse"
    properties:
      metadata:
        responseItems:
        - type: "text"
          text: "AskPizzaSize 넣어야 할 곳이예요"
    transitions:
      return: "done"
수정 후
####### AskPizzaSize 단계를 아래에 복사헤 주세요
  AskPizzaSize:
    component: "System.CommonResponse"
    properties:
      variable: "pizzaSize"
      nlpResultVariable: "iresult"
      maxPrompts: 2
      metadata:
        responseItems:
        - type: "text"
          text: "<#if system.invalidUserInput == 'true'>크기 선택이 잘못되었습니다. 다시 선택해 주세요.\
            \ </#if>어떤 크기의 피자를 원하십니까?"
          name: "What size"
          separateBubbles: true
          actions:
          - label: "${enumValue}"
            type: "postback"
            payload:
              action: ""
              variables:
                pizzaSize: "${enumValue}"
            name: "size"
            iteratorVariable: "pizzaSize.type.enumValues"
      processUserMessage: true
    transitions:
      actions:
        cancel: "Intent"
      next: "AskLocation"
AskPizzaSize 단계 후에는 배달 위치를 묻게 되고 사용자가 자신의 Location 정보를 보내는 단계인 AskLocation를 수행하게 됩니다.
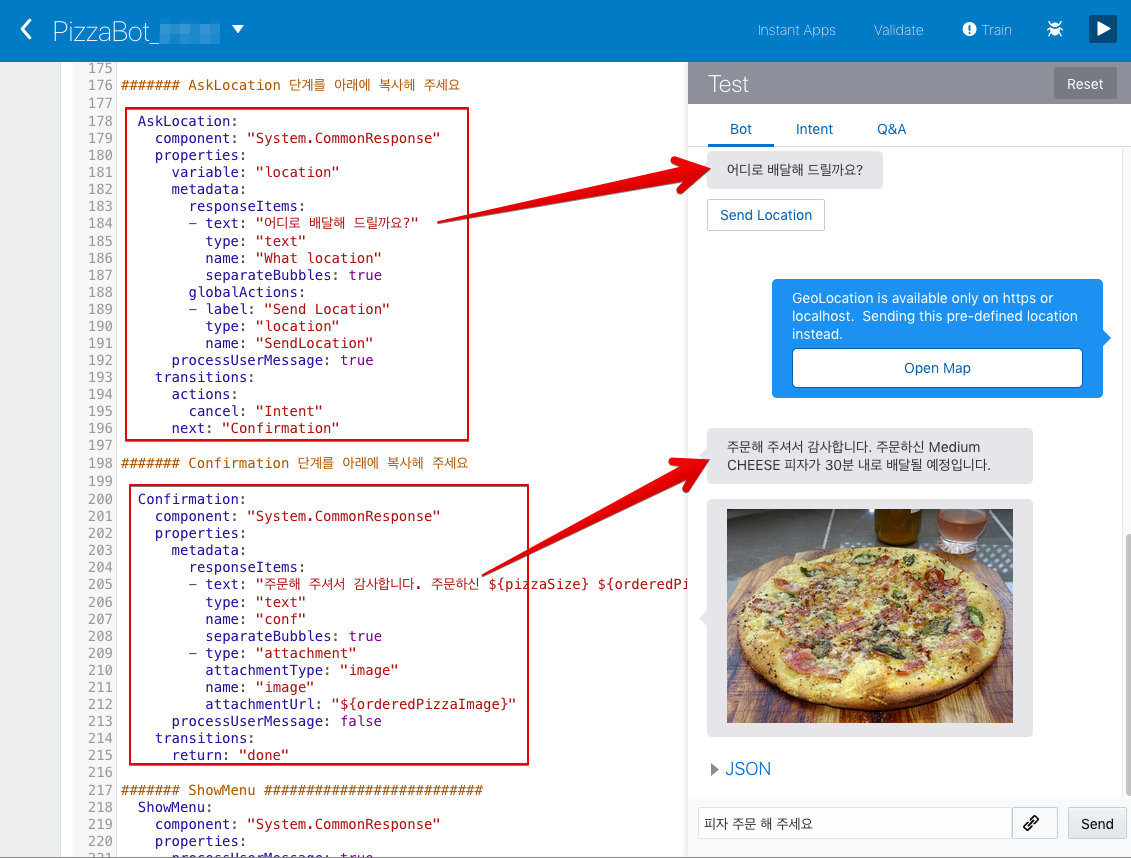
”####### AskLocation 단계를 아래에 복사헤 주세요” 주석 아래에 다음을 추가해 주세요.
####### AskLocation 단계를 아래에 복사헤 주세요
  AskLocation:
    component: "System.CommonResponse"
    properties:
      variable: "location"
      metadata:
        responseItems:
        - text: "어디로 배달해 드릴까요?"
          type: "text"
          name: "What location"
          separateBubbles: true
        globalActions:
        - label: "Send Location"
          type: "location"
          name: "SendLocation"
      processUserMessage: true
    transitions:
      actions:
        cancel: "Intent"
      next: "Confirmation"
마지막 단계로 주문 확인을 수행하는 Confirmation 단계를 추가해 줍니다.
”####### Confirmation 단계를 아래에 복사헤 주세요” 주석 아래에 다음을 추가해 주세요.
####### Confirmation 단계를 아래에 복사헤 주세요
  Confirmation:
    component: "System.CommonResponse"
    properties:
      metadata:
        responseItems:
        - text: "주문해 주셔서 감사합니다. 주문하신 ${pizzaSize} ${orderedPizza} 피자가 30분 내로 배달될 예정입니다."
          type: "text"
          name: "conf"
          separateBubbles: true
        - type: "attachment"
          attachmentType: "image"
          name: "image"
          attachmentUrl: "${orderedPizzaImage}"
      processUserMessage: false
    transitions:
      return: "done"
피자 주문을 위한 flow가 모두 완료되었습니다. 우측 상단의 Validate를 클릭하여 flow에 오류가 없는지 확인합니다.
bot flow는 Yaml로 되어 있습니다. Yaml은 Indentation이 매우 중요합니다. 오류가 계속 발생한다면 들여쓰기가 잘 맞게 되어있는지 확인해보세요.
오류가 없다면 Test UI를 열어서 추가된 로직이 잘 동작하는지 확인 합니다. 왼쪽 하단의 ▶ 버튼을 클릭하여 Test UI를 엽니다.
Test UI는 위에서 테스트 했던 것처럼 Flow화면 우측이 아닌 새로운 페이지로 나타날 것입니다. 아래 이미지의 테스트 순서에 따라 테스트 하면 됩니다.

피자봇 만들기 실습 과정이 완료되었습니다.
Chatbot-Workshop Lab
- 챗봇 Hands-on Lab (1) - Lab 개요
- 챗봇 Hands-on Lab (2) - 금융봇을 이용하여 챗봇 기본 기능 익히기
- 챗봇 Hands-on Lab (3) - 피자봇 만들기
- 챗봇 Hands-on Lab (4) - [채널 연결] Web Chat 연결하기
- 챗봇 Hands-on Lab (5) - [채널 연결] Mobile 앱 연결하기
- 챗봇 Hands-on Lab (6) - Insights(분석) 기능 사용하기
- 챗봇 Hands-on Lab (7) - Custom Component 구현하기
- 챗봇 Hands-on Lab (8) - Instant App 구현 및 챗봇 연계
- 챗봇 Hands-on Lab (9) - WebView 구현 및 챗봇 연계